SiteScope Alerts is one of the best features of this software.
SiteScope continuously monitors different systems/servers and if any issues or errors are found in the servers, SiteScope will automatically trigger the alerts to emails and mobiles, according to the thresholds that are set in SiteScope.
The better you configure the SiteScope alerts the better you can monitor the business. Some of the best features that SiteScope is agentless monitoring which helps to monitor easily without installing any agent in the servers.
SiteScope Alerts can be configured in different ways according to your requirement. SiteScope alerts can be configured to individual monitor, one or two monitors, one or more group of monitors, a combination of groups and monitors, or we can also configure overall for all the groups and monitors.
Alert Actions:
In the following section you will see a step by step options that you can create Sitescope Alerts.
When you create an alert in SiteScope, the alerts are triggered according to the thresholds that you set. You can set the alert action in such a way that the alert can be triggered to different media such as email, mobile apps, and through SMS. You can schedule when to send the alerts during different time periods. There is also an option to turn off the alerts. For example, you can turn it off during weekends. You can also turn the alerts on or off during server maintenance.
How to configure Sitescope Alerts:
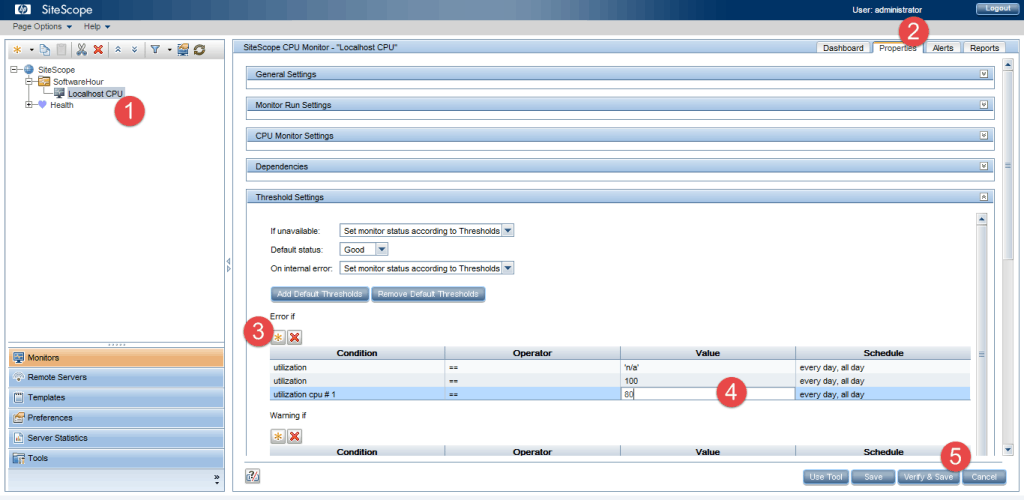
I will show you how to set up an alert for the localhost Sitescope CPU resource. For this tutorial, I will set this condition: If the CPU utilization meets the 80 percent, Sitescope will trigger the alert to my email.
Setup Properties: Before we set up alerts for any monitor, we need to set up the properties of that monitor.
- Select the monitor.
- Select properties tab.
- Select threshold settings.
- Click * button on “Error if”.
- Add CPU percentage as 80 as shown in the image.
- Click on verify and save.

Set up Alerts: Once you set up the properties, follow the below steps:
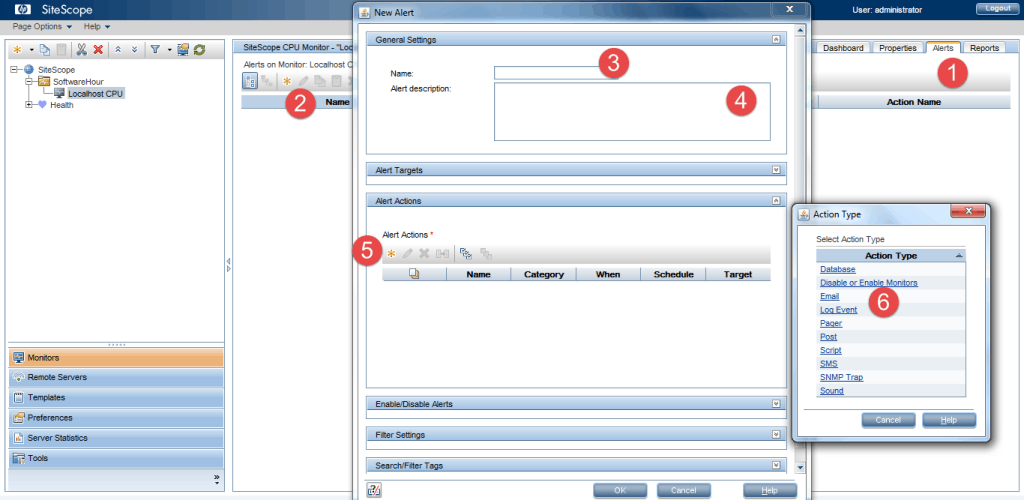
- Select the Alert Tab.
- Click on the * button as shown in the image, a new pop-up window opens up.
- Give the alert name.
- Give the description of the alert.
- Go to Alert Actions and click on * button.
- Select action type as email.
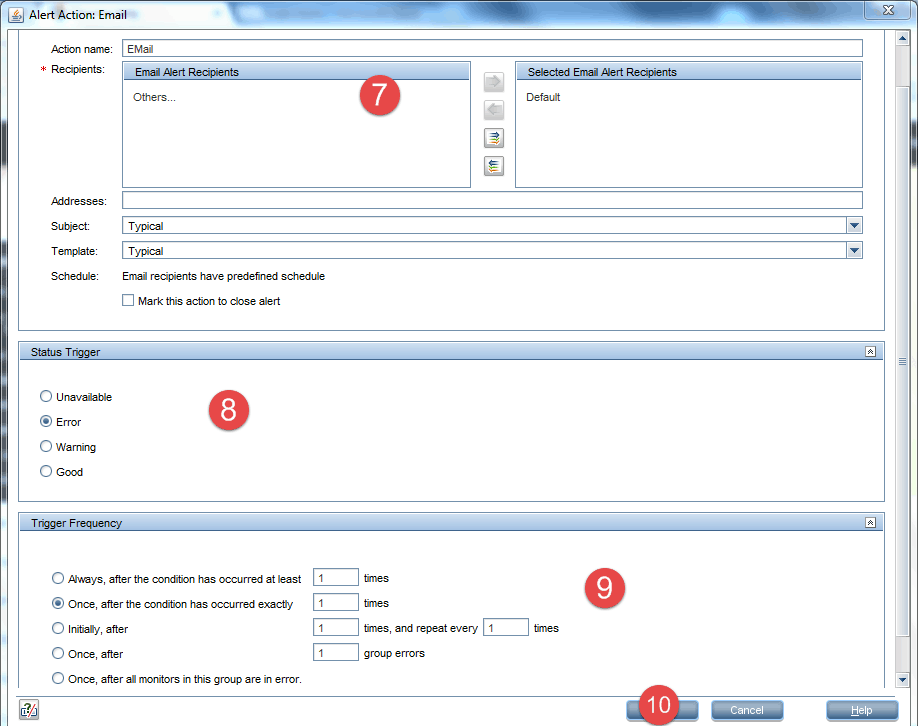
- A new window opens up – Select the recipients to whom the alert should be sent.
- Select Status Trigger type.
- Select Trigger Frequency.
- Select Click on OK.
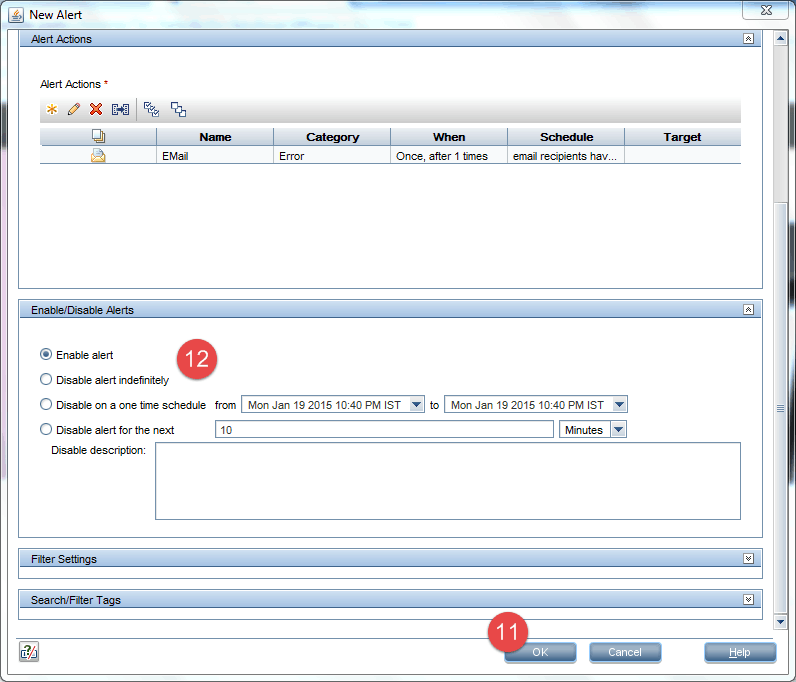
- And again, click on OK.
- You can also enable or disable the alert as shown in the image.


