In this tutorial, we will show you how to monitor different operating systems from Sitescope.
How to add Unix/Linux server to Sitescope:
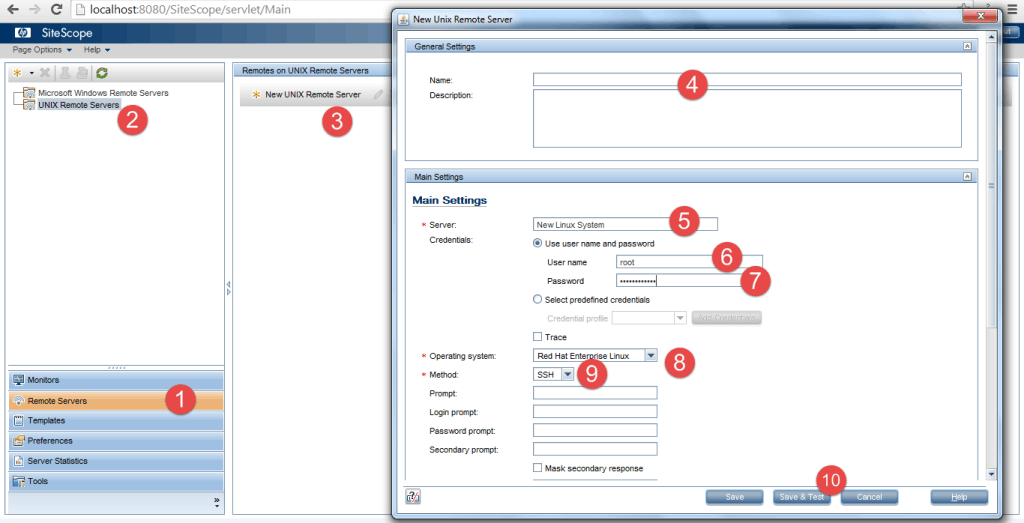
- Click on Remote Servers.
- Select UNIX Remote Servers.
- Click on Unix Remote Server
- Give the name of the server
- Provide the IP address of the server.
- Provide the username of the server
- Provide the password of the server.
- Select operating system.(Linux/Windows).
- Select method as SSH/rlogin/Telnet.
- Click on save and test.

Due to security reasons,connecting to Unix system will not be as smooth as discussed above.
Some Unix servers need a private/public key files to connect to the servers. You can ask your Unix administrator for key files and convert these into an SSH file using puttygen. Please note that Sitescope only accepts SSH files. Once you get the SSH file, go to C:\SiteScope\groups\ and create a folder called Identity and paste your SSH file and follow below steps to add Linux system.
How to add Unix/Linux Server using SSH:
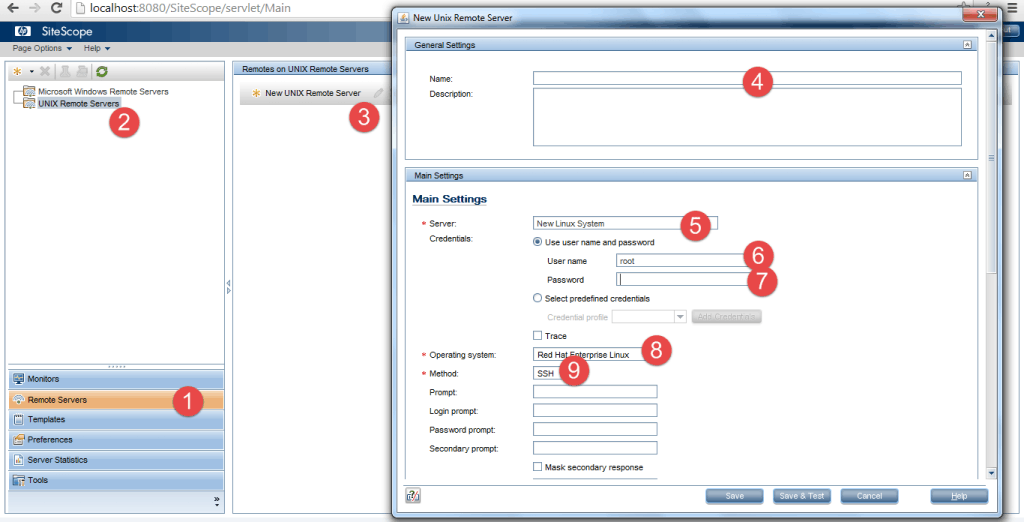
- Click on Remote Servers.
- Select UNIX Remote Servers.
- Click on new Unix Remote Server
- Give the name of the server
- Provide the IP address of the server.
- Provide the username of the server
- Leave the password field blank.
- Select operating system. (Linux/Windows).
- Select method as SSH.
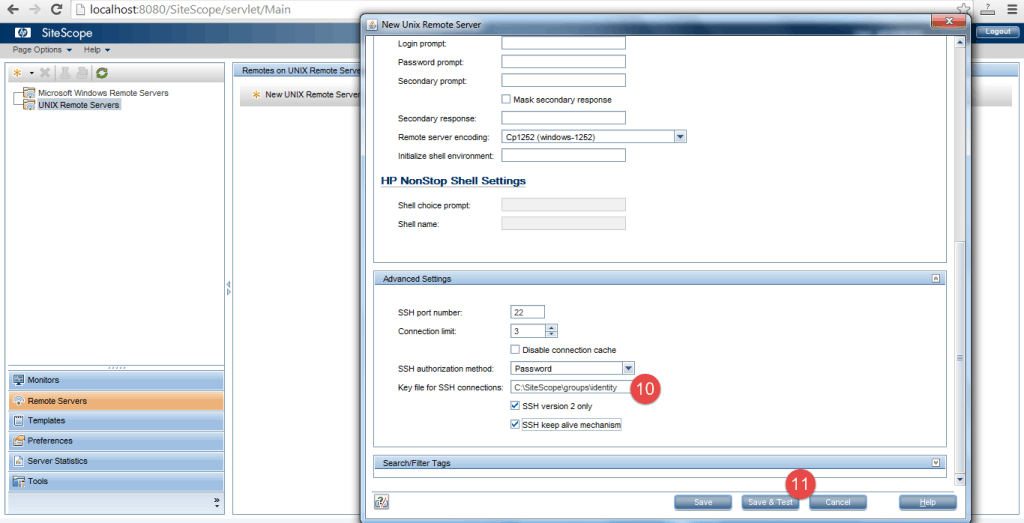
- Go to advanced settings and give the full path of SSH as shown in the image below.
- Click on save and test.


How to add a Windows Server to Sitescope:
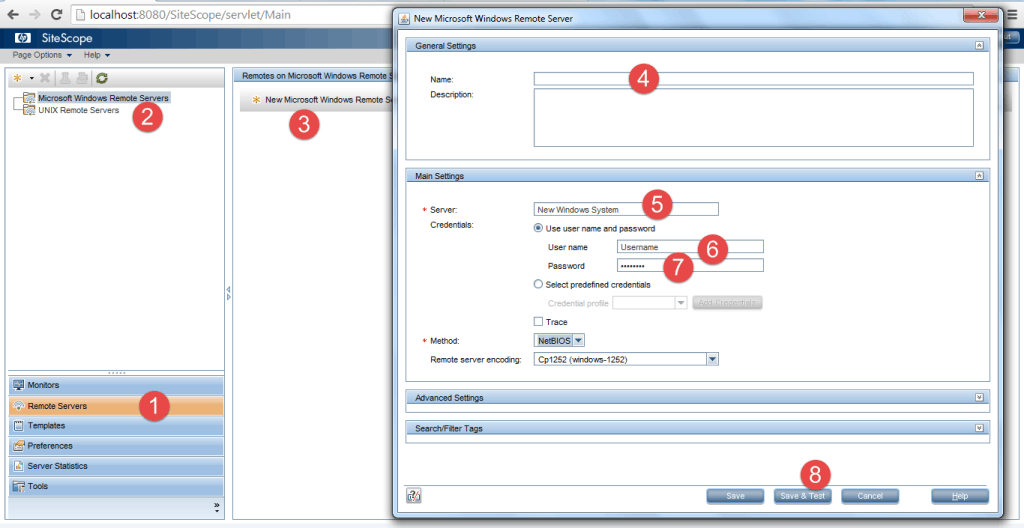
- Click on Remote Servers.
- Select Microsoft Windows Remote Servers.
- Click on New Microsoft Windows Remote Servers.
- Provide the name of the server
- Provide the IP address of the server.
- Give the user name.
- Give the password
- Click on save and test.

If you face any problems in adding operating systems to Sitescope, feel free to post in the comments below. We’ll help you fix obstacles you may encounter along the way.