In this JMeter Tutorial, you will learn how to create JMeter Test Plan. Now since we have learned how to download and install JMeter, now we should start working on JMeter.
The first thing we need to work on JMeter is to build Test plan in JMeter. Now before making Test plan in JMeter, we should understand what Test plan is.
In JMeter, a Test plan may be considered as root node which contains many elements/nodes, as according to the requirement so that we can do load testing.
Now it is important to understand the elements/nodes to have a better understanding of Test plan.
These elements or nodes may be different types of elements of the JMeter, like Thread Groups, Logic Controllers, Configuration Elements, Timers, Listeners, and Assertions.
There is one thing that should be kept in mind that Test plan can never be empty and there should be at least one thread group in every Test plan. These threads can be added or removed based on our requirement.
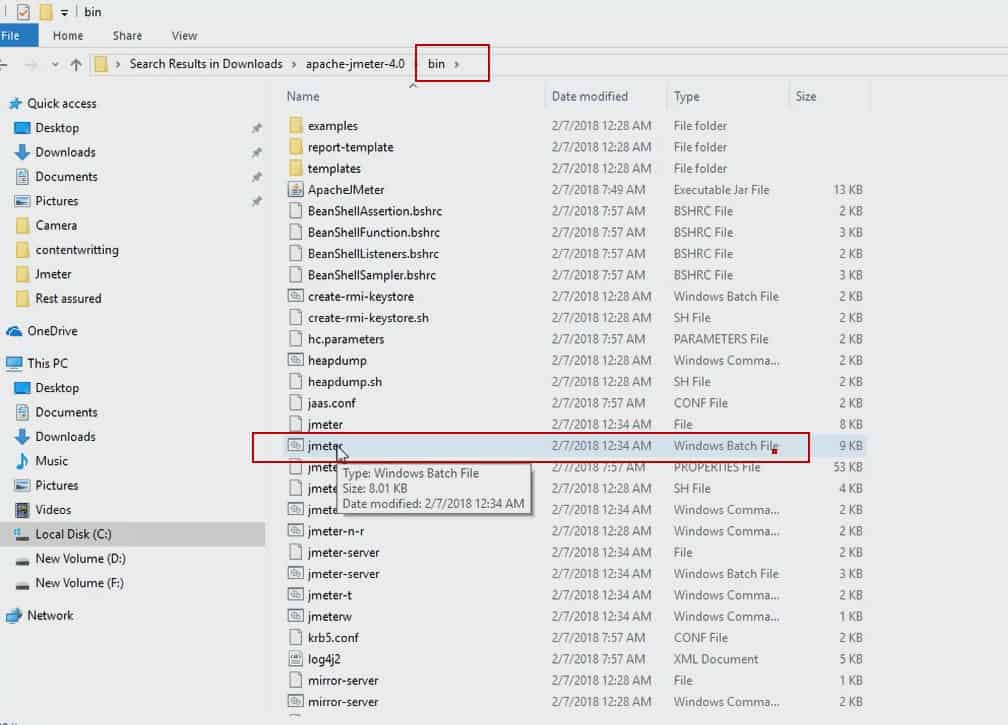
Let us see how we can make Test plan to run the Load test on JMeter. The first step is to launch JMeter. For that we need to go to the folder which is bin folder of JMeter, here in our case it is as given below.
“C:\Users\HP-PC\Downloads\apache-JMeter-4.0\bin”. We just need to click on Jmeter.bat file which is Windows batch application.
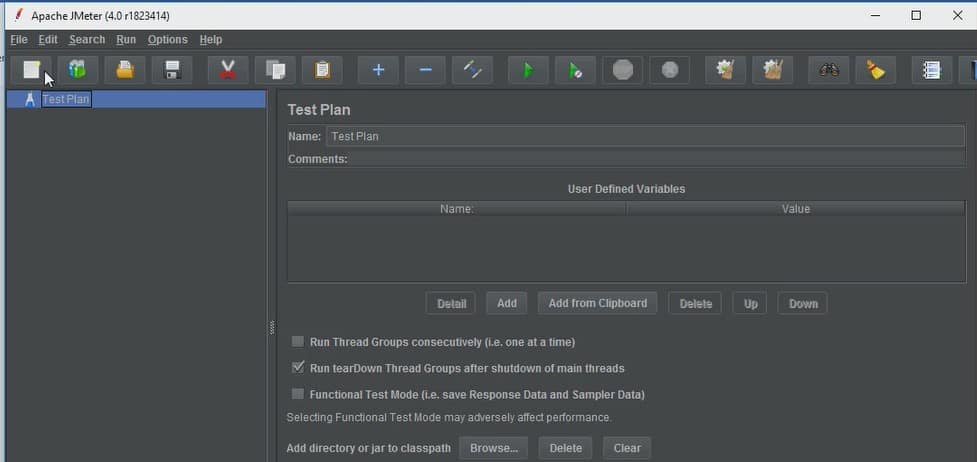
After clicking on this batch file, JMeter GUI will open. Now since JMeter is open, we will prepare JMeter Test plan to start load testing.
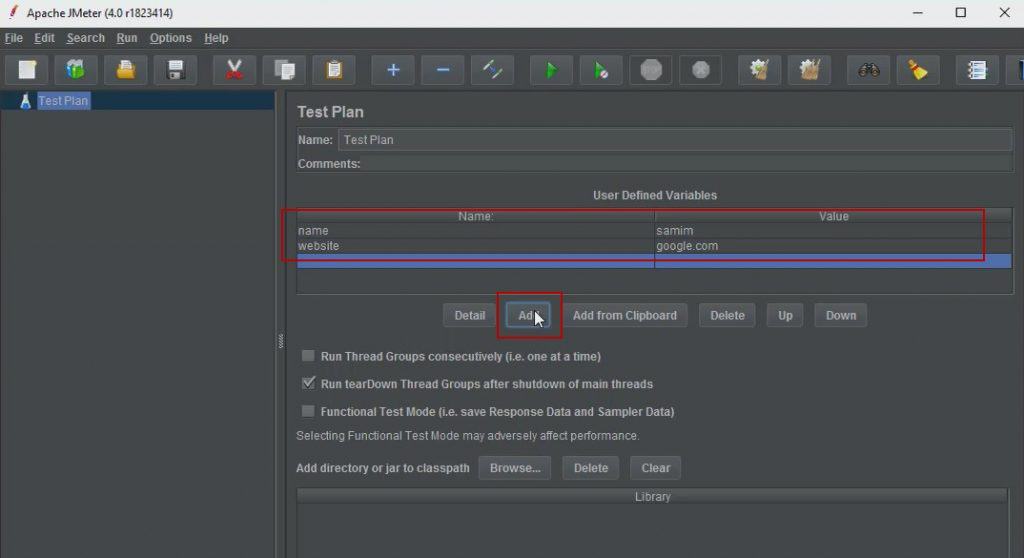
Many times it happens that we need to use same value in several parts of that the Test plan , for that we use user-defined variables which will be initialized once and will be used at all places required.
The advantage of a user-defined variable is that we just need to change the value of a variable at one time and it will be reflected at several places where it has been applied.
Meanwhile, the section below you can see that we can rename our test plan. In the user-defined variable section, we can add variables and assign a value to the variable and can use it at multiple places, wherever required.
We just need to add “$” sign before the variable to access it. We can also change value at one point and it will be reflected at all places where the variable has been used.
Add and Remove Test plan Elements
Now after we have created a Test plan for JMeter, our next step should be to learn how to Add and Remove Elements to the JMeter Test plan.
Let us see how we can add elements to JMeter test plan. Steps to Add Elements to JMeter Test Plan are as given below.
- The first step is to select test plan node
- Then we will right-click the selected element
- Then we need to mouse hover on “Add” option, then all the Elements list will be displayed from which we need to choose our desired element.
- Now we need to mouse hover on the desired list element and select appropriate option by clicking it
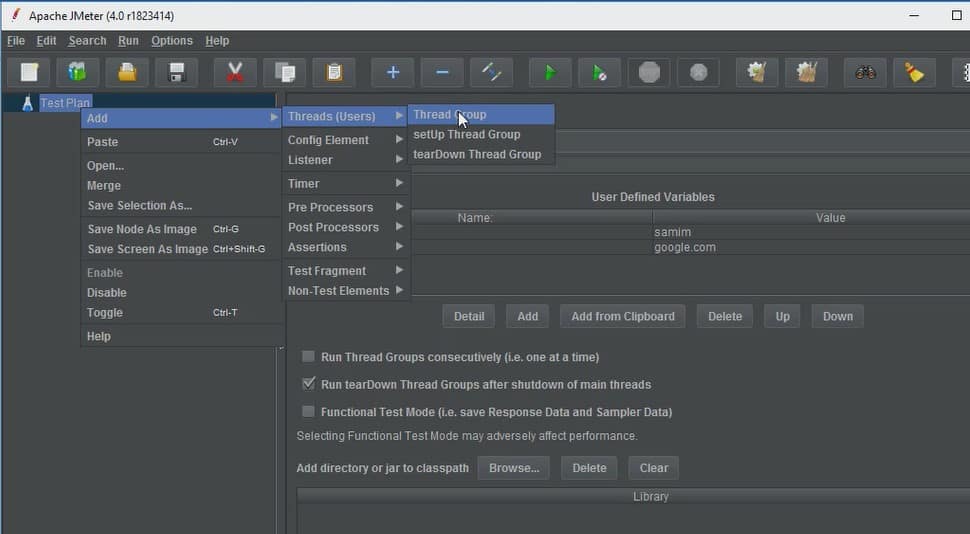
Now that we have added the Thread Group element, now we can see the screen which is shown in the screenshot below.
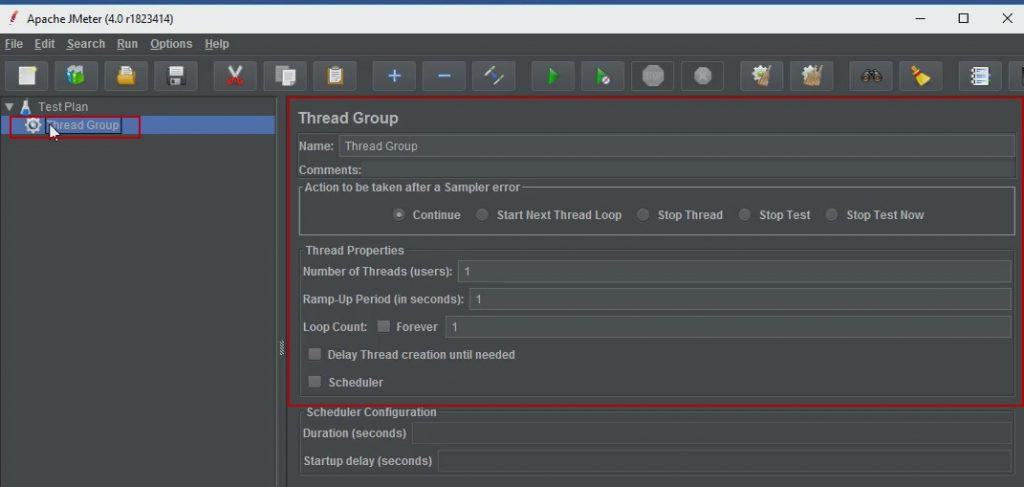
We know that we can add any number of test elements in the JMeter test plan depending on our requirement. At the same time, we may also want to remove some of the element or nodes from the test plan.
So we need to understand how to remove element from JMeter test plan. Steps to remove elements from JMeter Test Plan are given below.
- First step is to select the desired element
- Second step is to right click on the element
- Now we need to choose the “Remove” option
- Now we will click on “Yes” on the remove confirmation popup
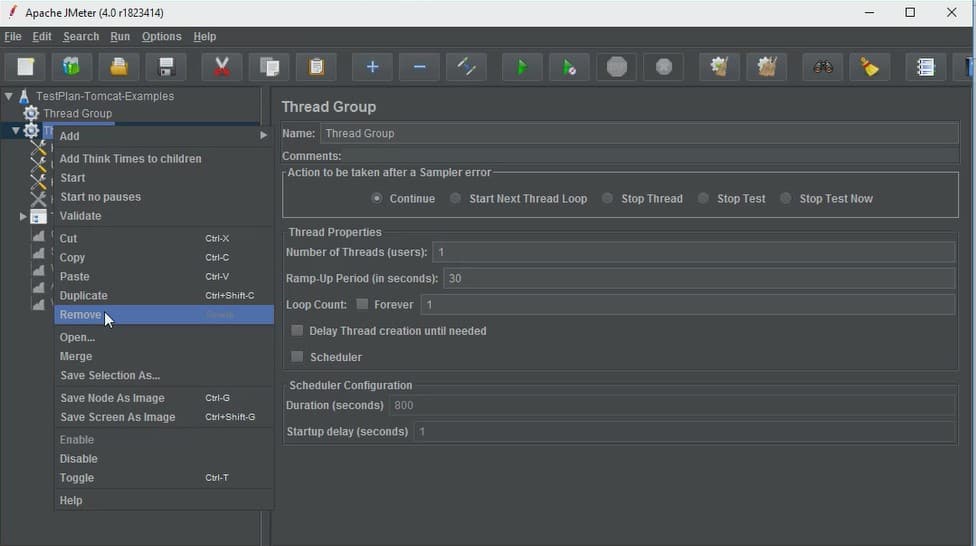
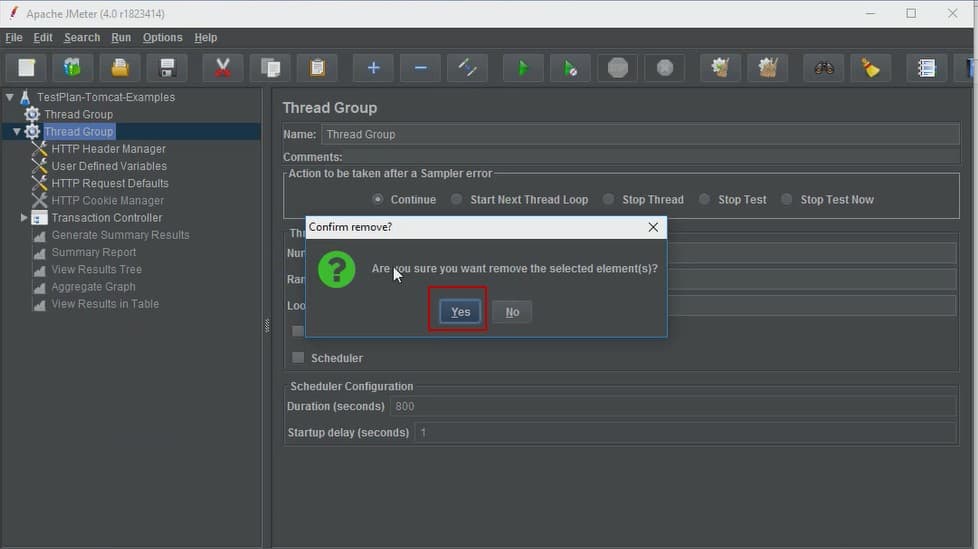
Now that we have learned how to add elements or remove the element from the test plan, according to our requirement, now we should learn how to add elements from another JMeter test plan.
Let us see how we can do it. Steps for loading Elements to JMeter Test Plan Tree are given below.
- The first step is to select and right-click on any Tree Element, in which you want to add the loaded element already present in the form of .jmx file.
- Now we need to select “Merge” option
- Now we have to choose the .jmx file where you saved the elements
- Now we can see that elements have been merged into the tree
- Last but not least, we need to save test plan/element
Screenshots for the same are as given below.
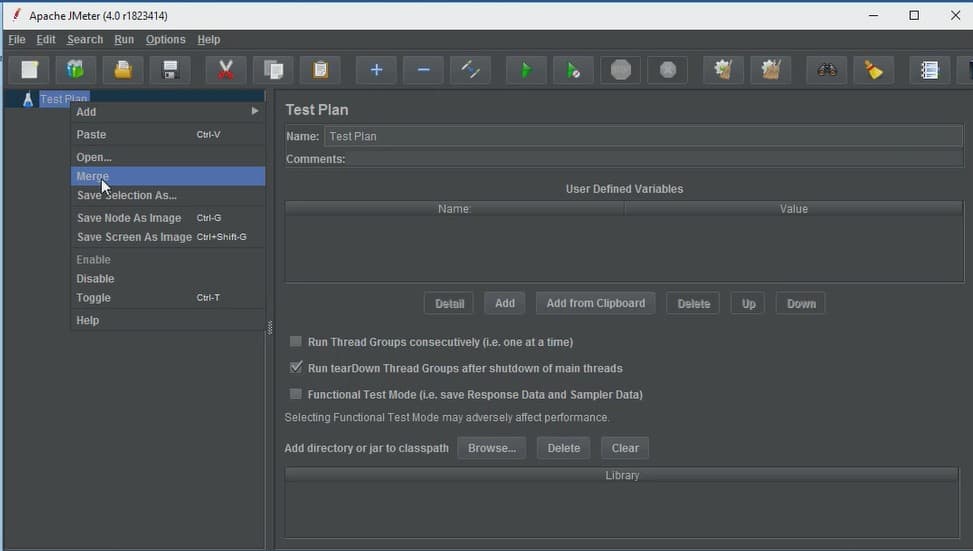
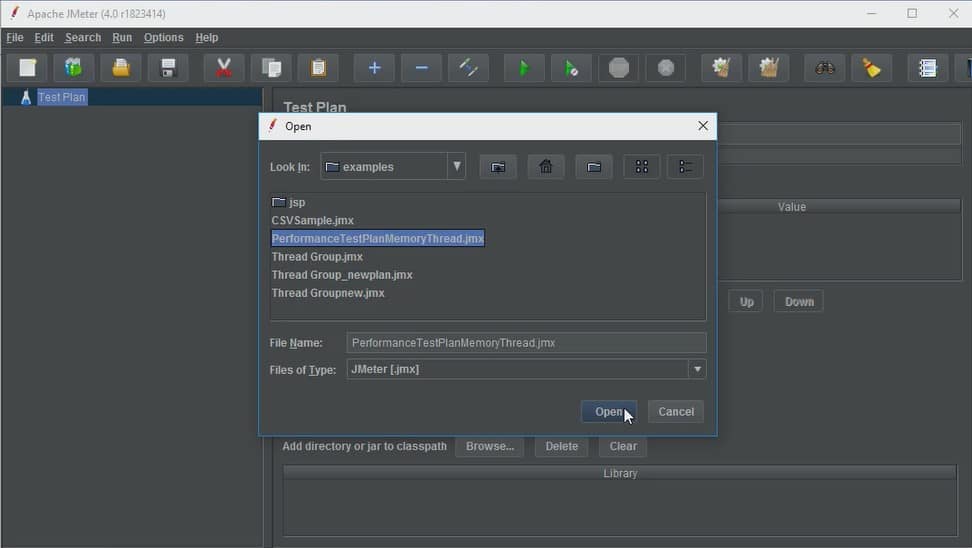
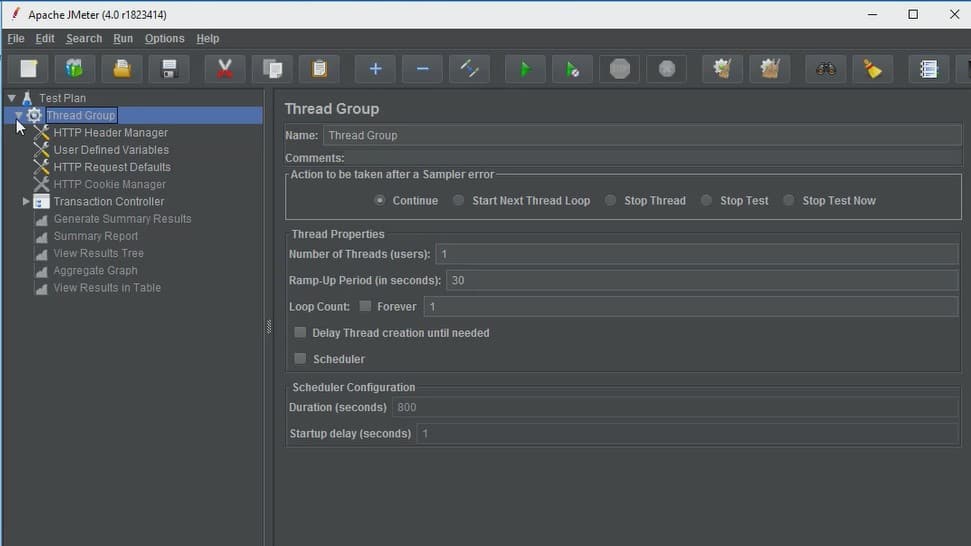
Now after loading elements from .jmx file in the test plan, we are ready to save test plan which can be done in many ways. One way of doing it is given as below.
- At first, we will select and Right click on the element
- Then we have to choose “Save Selection As” option
- After that, we will save file on the desired location
- We can see that all the elements are saved inside the test plan.
- Screenshots for the same are given as below.
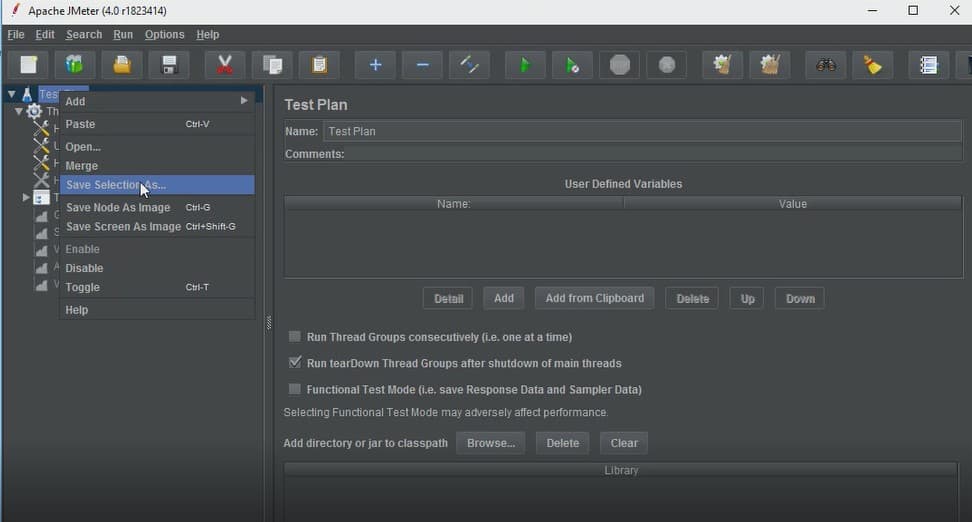
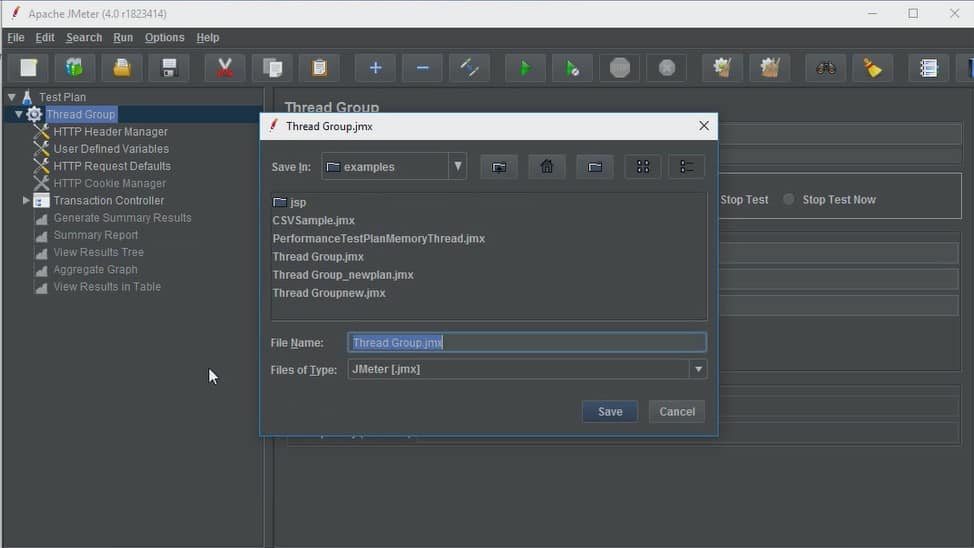
Now after loading the test elements inside the test plan, we know that we should save test plan before executing it. We have already seen one way of doing the same. We can do it in other way also. We can also do it by choosing “Save” or “Save Test Plan As” from File menu. Screenshot for the same are as given below.
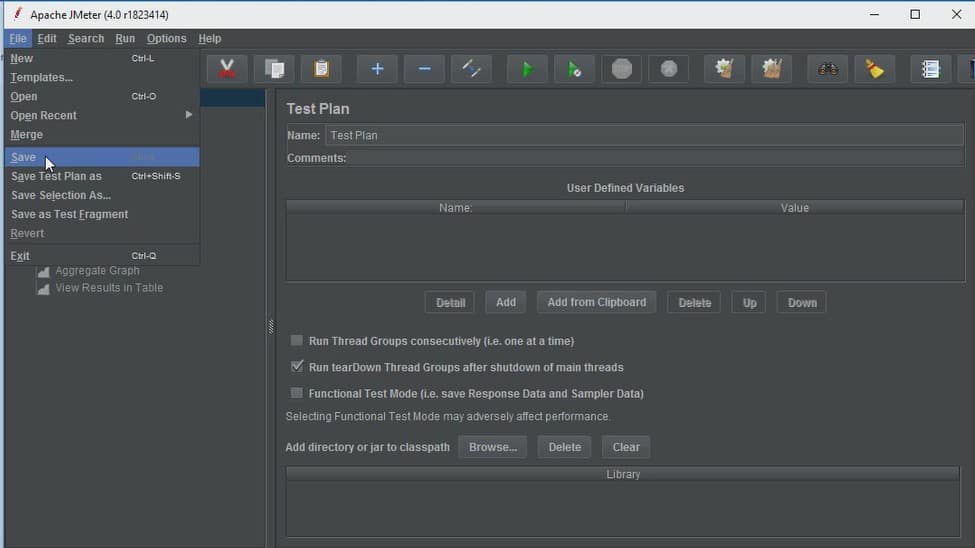
So we can see how easy it is to create a test plan in JMeter. Just we need to have an understanding of basic things to create test plan in JMeter.