In this tutorial, you will learn different Elements of Test Plan in JMeter. Once we understand all the elements of a test plan, we are ready to do performance testing on any web application using the tools JMeter.
Let us look at some of the elements of the test plan in JMeter. The first important element to understand in the test plan is Thread Group.
Thread Group
Let us understand what thread group in JMeter tool is. Thread group in JMeter is actually used to define the scenario of load testing in JMeter. When I am talking about scenario it involves many things.
It involves number of threads. Before moving further, we should understand what a thread in JMeter is. Thread in JMeter represents one virtual user.
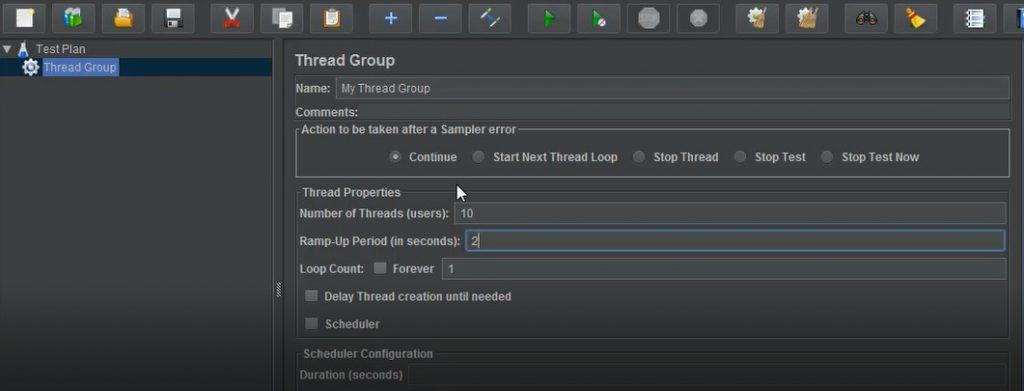
If I am defining the Number of Threads(users) as 10 which means that we will put the load of 10 users on the server. We can also use it for defining Ramp-Up Period in second.
The ramp-up time is the time taken by JMeter to ramp up to the full number of threads that have been defined in the Thread Group setting.
If I am defining ramp up of 2 seconds and the number of threads we are putting as 10 which means that in two second all my 10 threads will be up and running and 5 Threads will start in one second.
We can also define loop count. Loop count means the number of iterations which we want the test to be performed or in simple words; we can say that it is the number of times for which we want to run the scenario.
Now there is one thing that we need to see prior to setting Thread Properties and understand it clearly.
We need to see is “Action to be taken after a Sampler error” and we can see here that default value is Continue and which means that JMeter will ignore the error and move to the next element in the tree and it will continue running the thread.
Now there is another option stating Start Next Thread Loop which means that JMeter will stop the current thread and will start next thread execution, now the third option is to Stop Thread which means that the thread which is under current execution will stop.
Now next test option is Stop Test which means it will stop entire test execution and the last option is Stop Test Now which means that the entire test will be stopped by the pool then and there itself immediately.
Logic Controller
Logic controller helps us to organize the order of processing of samplers or request in the thread.
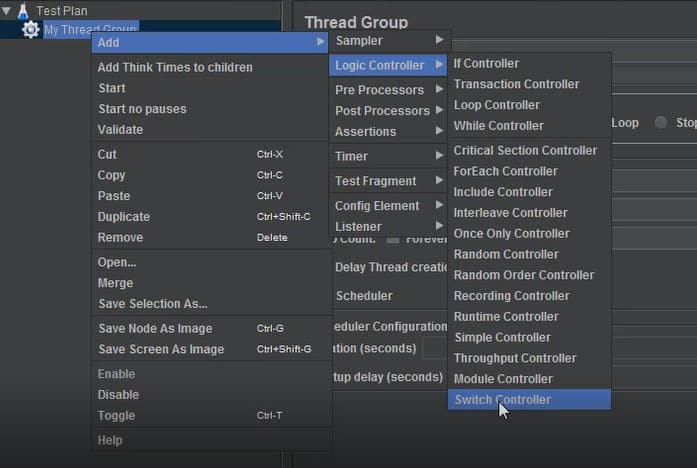
There are many types of the Logic controller which decides how and when to send the request to web server.
There are different types of controllers. Some of them are as below.
- Simple and loop controller
- Random and runtime controller
- If controller
- Foreach controller
- Advanced controller
Simple Controller
As we can conclude from name itself, it is most simple controller in JMeter. It is just used for containing request sampler.
There is no complexity in it and does not contain any logic. It can be simply considered as container.

Loop Controller
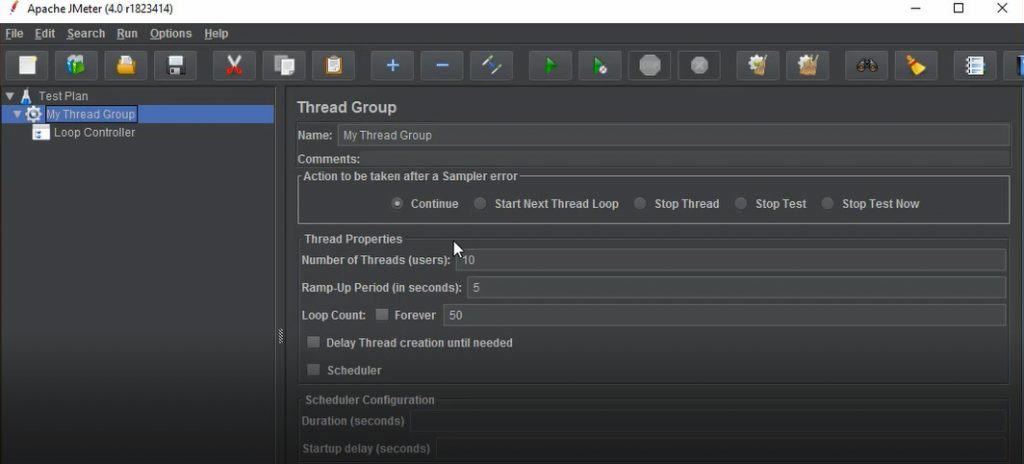
Loop controller is used for looping the scenarios which in the form of request samplers.
Now there should be a question coming in mind that when I am using loop count in the thread group itself, then why we are using loop controller.
In the thread group loop count is defined for all the scenarios defined in the test plan. But using loop controller we can change the number of execution of the particular transaction or scenario inside whole test plan.
It allows first to execute child requests multiple numbers of times before executing next request inside the thread group of the test plan. So we can plan multiple different types of scenarios using this controller.
Runtime Controller
We can have little idea of this controller from the name itself. The advantage of this controller is that we can run a particular transaction or scenario for a fixed duration of time.
We can put particular transaction inside runtime controller and run for defined time. One thing to be noted here is that in the thread group we have to run the whole scenario only once so that we can concentrate on one particular transaction inside runtime controller.

If Controller
Anyone who has programming knowledge or has basic knowledge of programming should have an understanding of if controller.
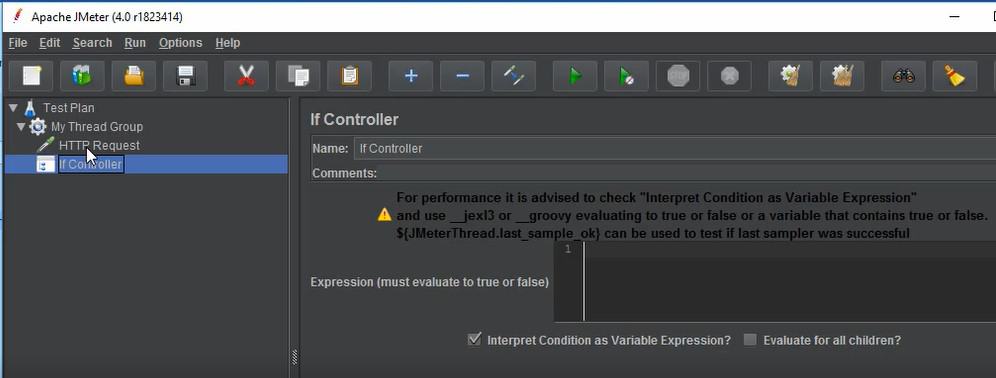
If you talk in layman language, we apply if statement only when we have to apply a condition that if condition will be this, then that will happen. Same applies here with the if controller here in JMeter.
If any transaction controller is inside if controller, then the transaction controller which is inside if controller will be executed only when condition given in if controller is true.
For Each Controller
This controller is not so commonly used. It is especially used in the scenario where result data returned from the earlier request is taken as input in the present transaction controller.
Every time the value of the input changes. So it works for dynamic data returned as a response to the result of the earlier transaction controller and which acts as input to the next transaction controller or we may say it as a sampler.
It is little complex to understand. We will understand it when we will be working on for each controller and from there only we will be able to understand it clearly.
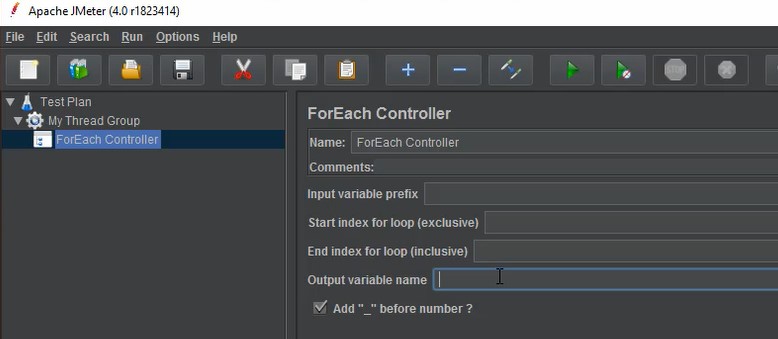
Now let us understand some of the advanced controllers which are given as below. But before that, let us understand the controllers are used in the same way as the earlier discussed controllers.
Let us look at one of the advance controller named Once only controller. This controller is used to execute the scenario only once. It cannot be executed multiple Times.
Suppose I am defining one big scenario and in the scenario login and logout scenario has to be executed only once so it can be put in Once only controller. It is also a very useful controller.
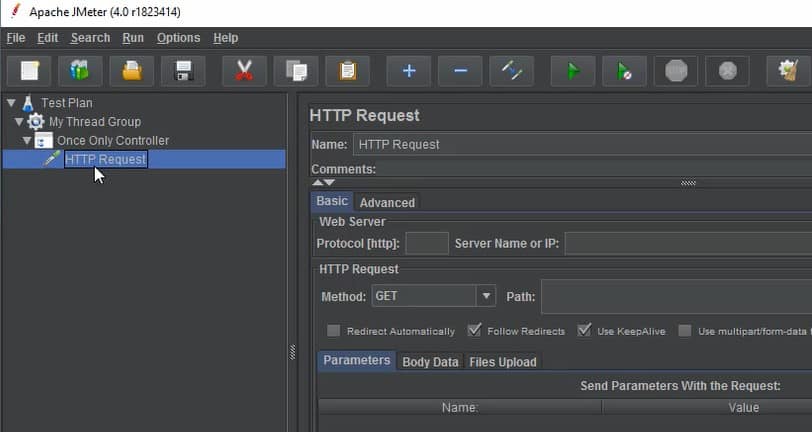
Throughput Controller
There is another scenario called throughput scenario which allows the performance tester to control how often it has to be used. It is provided with two options.
The first option is percentage execution which tells the controller to execute for certain percentage of iterations. Second mode in this controller is total execution which tells the controller to stop executing after certain number of execution is completed.
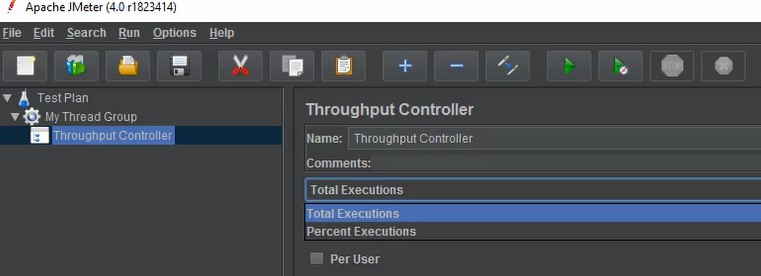
While Controller
Now we have heard of while statement in the programming. Same concept applies here. In while statement, we can make the statement Run depending on the condition.
Here also Wait Until condition is applied and script is allowed to run until the condition is false. As soon as the condition returns true, controller stops the execution of the script statement.
